Cozy, Renter-Friendly Lighting Collection
This collection brings together three warm and personal lighting DIYs, each designed to transform your space without the need for wiring, tools, or a big budget. As someone who loves creating cozy, meaningful spaces, I wanted to show how a few simple tweaks and thoughtful materials can completely shift the mood of a room. These projects are perfect for renters, dorm dwellers, or anyone looking to infuse their home with personality and comfort.
Tea-Stained Paper Lantern
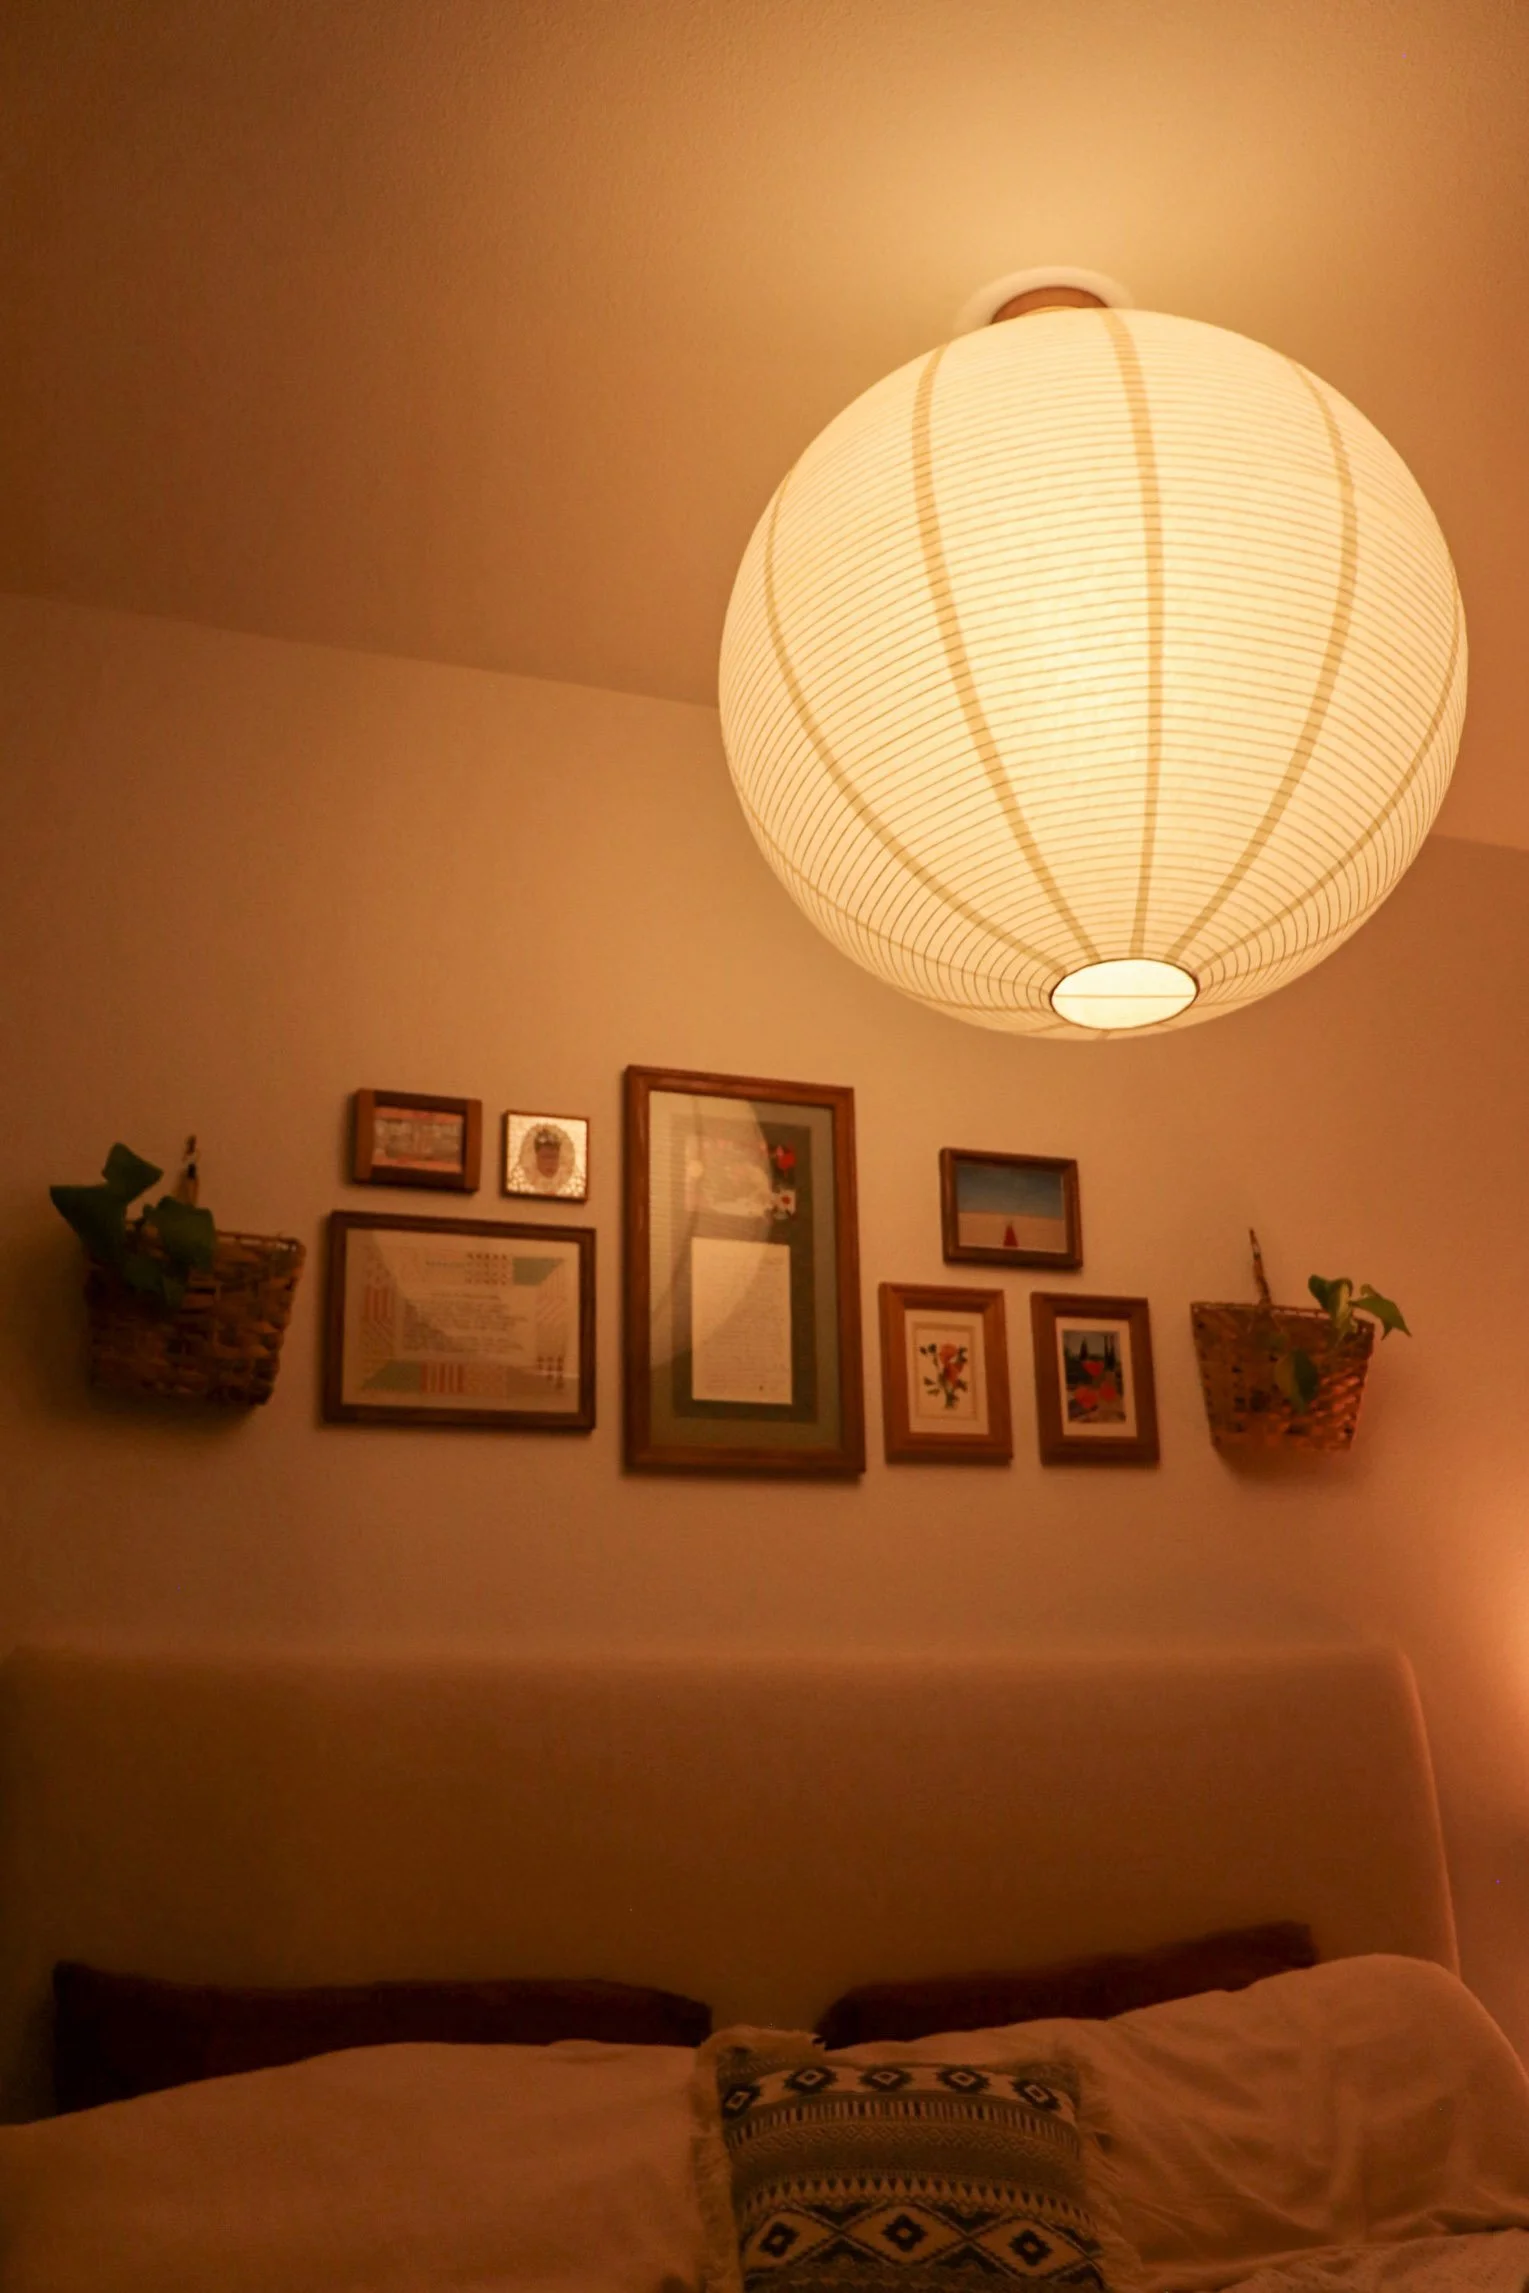
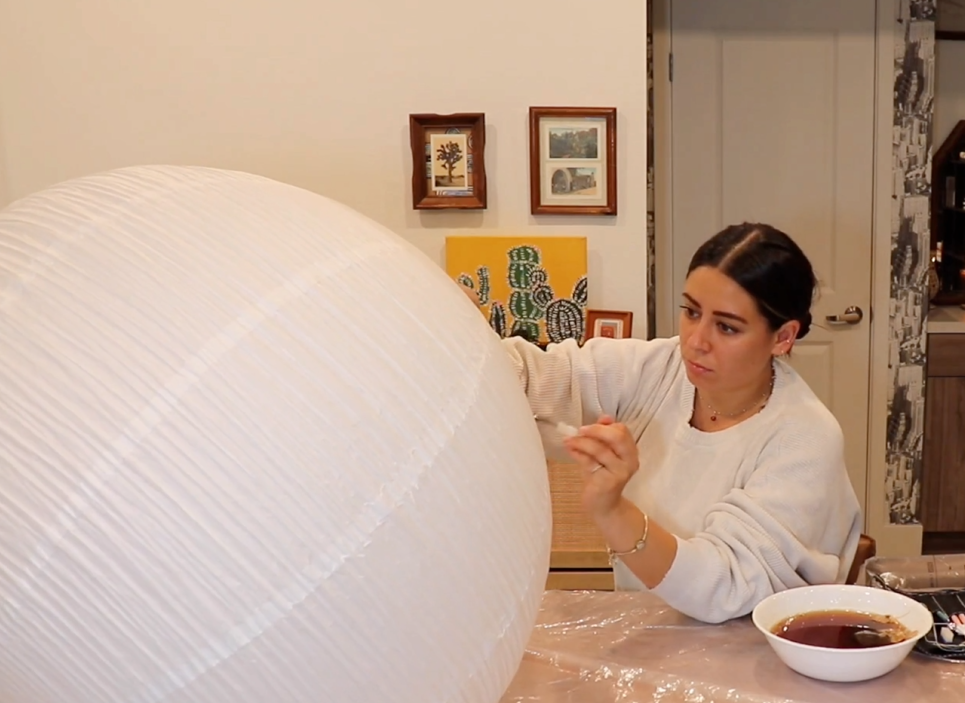
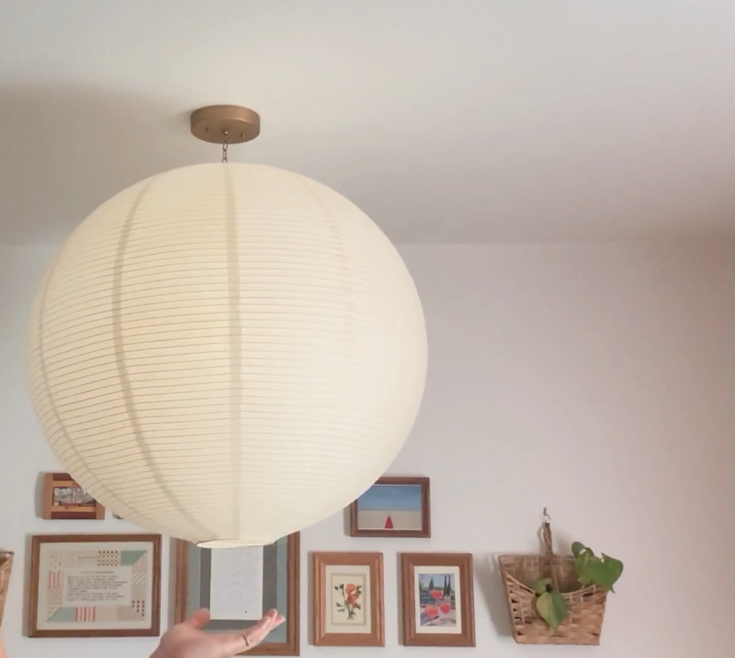
What started as a simple IKEA GULLSUDARE pendant shade became a softly glowing, vintage-inspired lantern. I steeped black tea and coffee to create a natural dye, then brushed the mixture over the paper surface to give it an aged, sun-warmed tone. It’s hung using 3M Claws and lit with puck lights; no electrical setup needed! The result is a gentle, organic light that feels handmade and timeless, perfect for cozy corners or reading nooks.


Supplies needed:
Paper Lantern (white or light-colored works best for the stain to adhere to)
Black tea (or any dark tea. More tea bags = stronger stain)
Hot water
A large bowl or cup for steeping tea
Soft paintbrush or sponge
Paper towels or old rags
Gloves (optional, to avoid stained hands)
Protective surface (newspaper, plastic sheet, etc.)
Optional second coat for a darker look (add coffee)
Chain at the desired length
Canopy kit light fixture
Plyers
Rub’n’buff (antique gold)
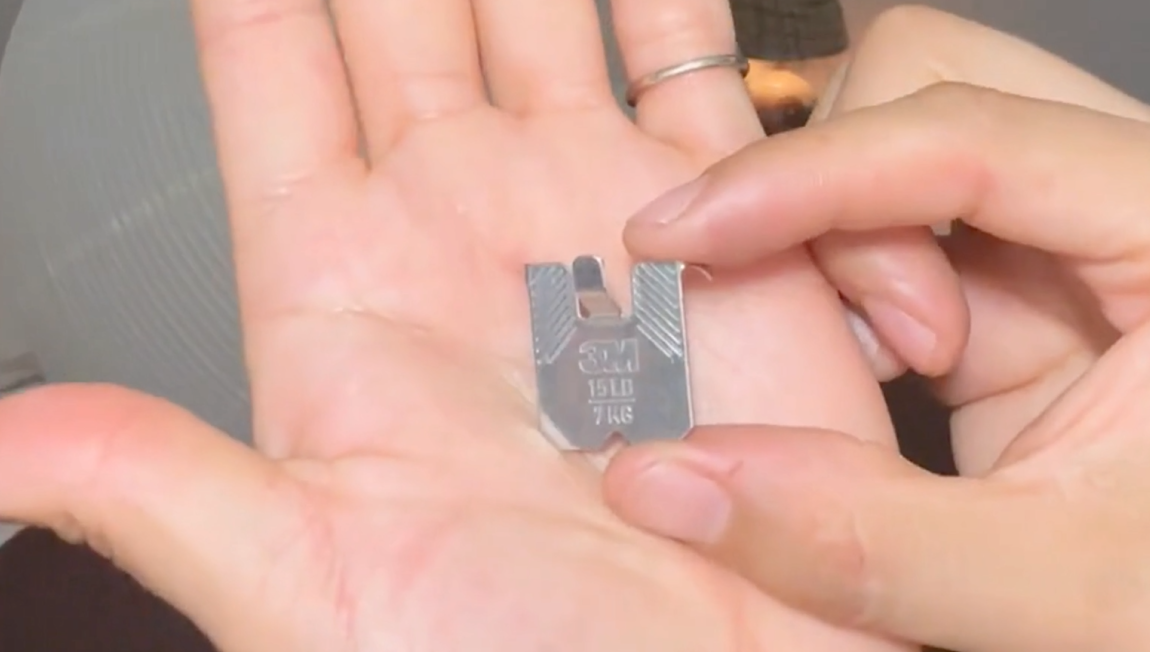
3M Claws (15 pound kit. Two are needed)
Step-by-Step Instructions for Lantern:
1. Brew a Strong Tea
Steep 4-6 bags in about 2 cups of boiling water.
Let it steep for 10-15 minutes. The darker the tea, the deeper the stain.
2. Cool the Tea
Let the tea cool to room temperature—don’t use it hot, as it can weaken or warp the paper.
3. Prep Your Area
Lay down newspaper or plastic to protect surfaces from stains.
4. Assemble your paper lantern if it’s not already put together
5. Test the Color
Before applying it all over, test the tea on a small area (preferably near the top as that will not be seen once it is hung).
Wait a minute to see how it dries—it will be lighter once dry.
6. Apply the Tea
Use a soft brush or sponge to gently dab or brush the tea onto the lantern.
Work in sections to prevent streaking.
For a more natural or aged look, vary the amount of tea and pressure slightly as you go.
7. Let it Dry
Hang the lantern to airdry completely.
Drying takes a few hours.
Do not rush this process as it could damage the lantern.
8. Repeat (Optional)
If you want a darker shade, apply a second (or third) coat after the first is fully dry.
…………………………………………………………………………………..…………………………
Optional Ideas:
Add a bit of coffee to the tea for a deeper or more brown-toned stain.
Spatter a few drops randomly for an aged effect.
Use a crumpled rag to dab on the tea for texture.
Tips & Warnings:
Avoid over-soaking the paper—too much liquid can tear it.
Don’t use lanterns with electric bulbs until they are completely dry.
Always check that the lantern is heat-safe if you plan to use any real lighting inside.
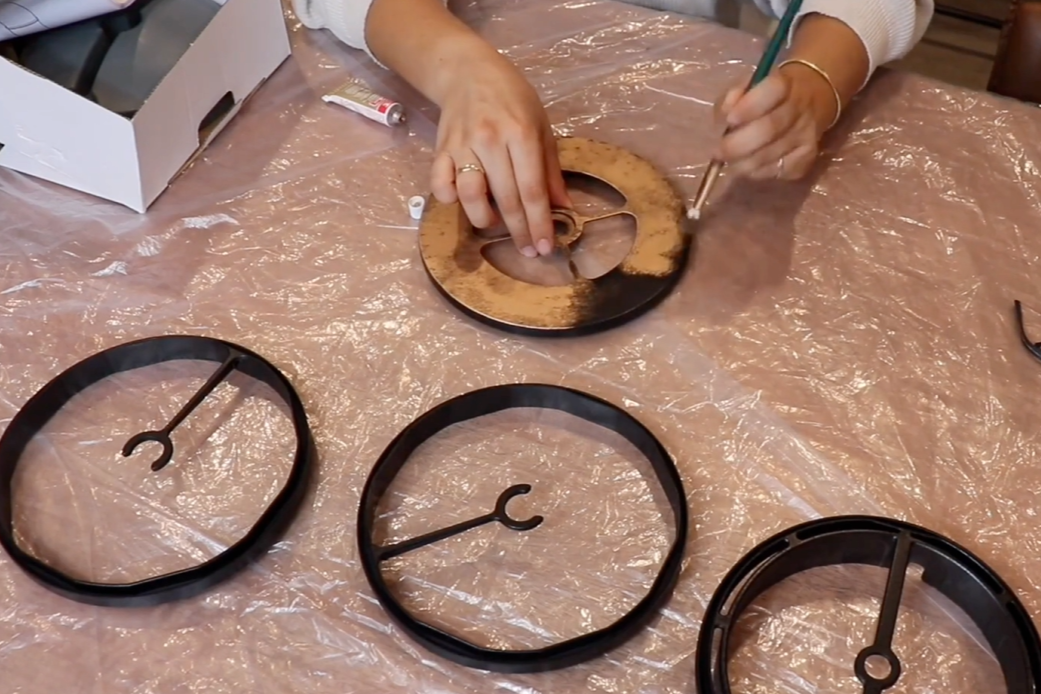
Step-by-Step Instructions for Light Fixture Base:
1. Open Canopy Kit
Once opened, use Rub’n’Buff to lightly brush on the gold finish in a circular motion
Wipe away any excess gold.
2. Chain
Repeat this process with your chain until you received your desired look.
3. Set both aside to dry for about 5-10 minutes.
4. Use your plyers to open the top link of your chain
Once opened, attach this chain to the thread hook link from the canopy kit.
Shut this link closed with the plyers.
Touch up any chipped away rub’n’buff.
…………………………………………………………………………………………..…………………
Assembly for the lantern and canopy kit:
1. Before assembling
Hot glue a piece of cardboard or wood to the lanterns wired center part that keeps the structures shape.
2. Add puck lights
Once dried, add puck lights to the cardboard piece on each side using the 3M adhesive that comes with the puck lights.
3. Attach 3M Claws to the ceiling
There will be two 3M Claws that will be facing each other so the hardware of the canopy kit can sits perfectly between both 3M Claws
4. Use the measuring cushions that come in the 3M Claw kit
These will be used for each side of the canopy kit hardware so it does not rock back and forth.
5. Attach the canopy with the remaining hardware pieces
Once supported and centered, screw on the two nut bolts to attach the whole fixture to the ceiling.
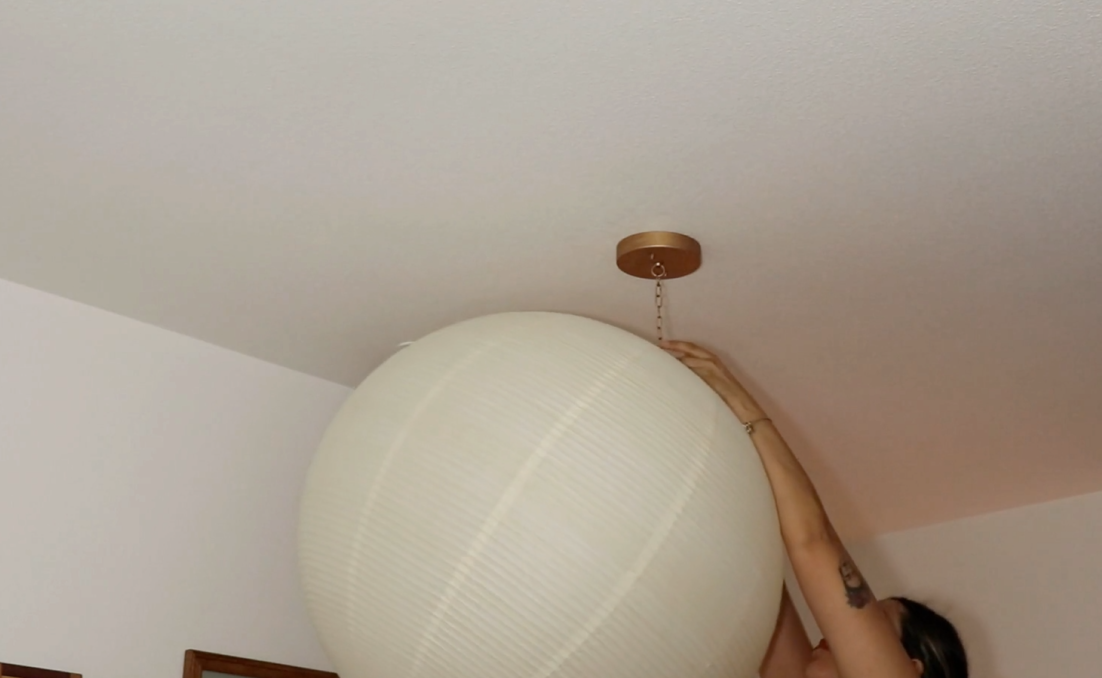
6. Attach the lantern to the chain
Using the C-hook that is located at the top of the lantern, attach the chain links from the mounted canopy light fixture. For extra support, attach one link to the top of the C-hook, and another link to the bottom of the C-hook.
Enjoy Your New Lighting Fixture
Renter-friendly: Minimal damage. No drilling required and 4 small holes were created by the two 3M claws.
Budget-friendly: For this elevated DIY lighting fixture, all the supplies that were needed only a total of $55.00
No Electrical needed: This lighting fixture can be added to any place in our home without the worry of electrical or wiring.
This can also be done by anyone who wants to elevate their space with a statement lighting fixture.
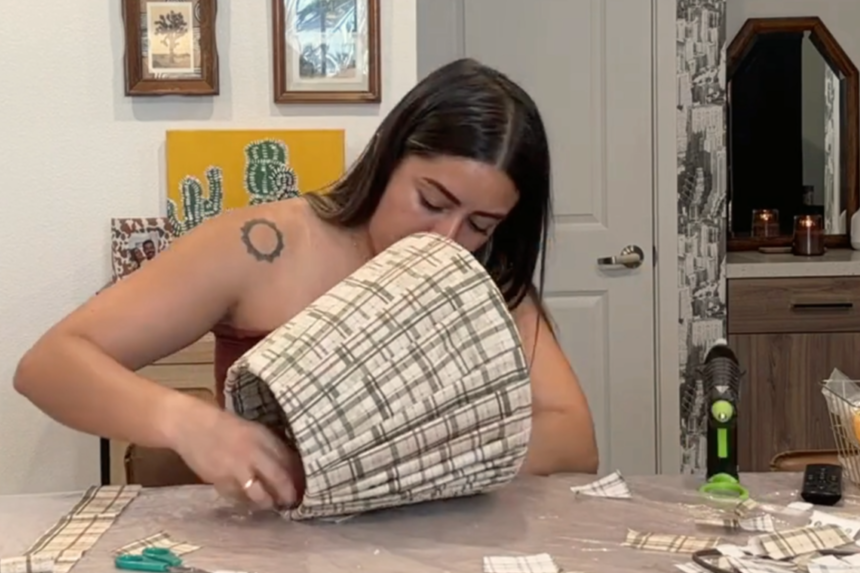
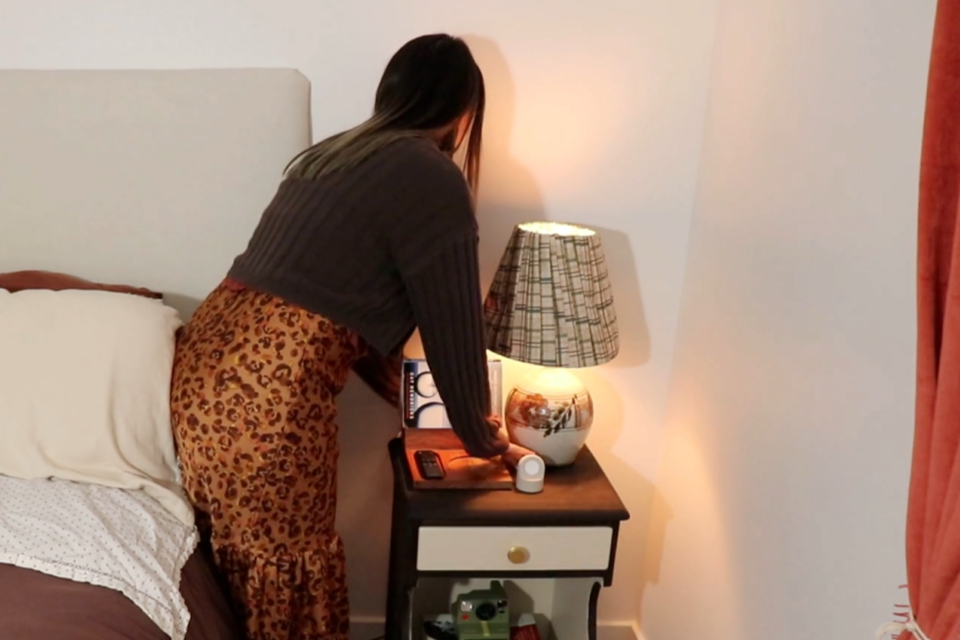
Upcycled Lampshade Makeover
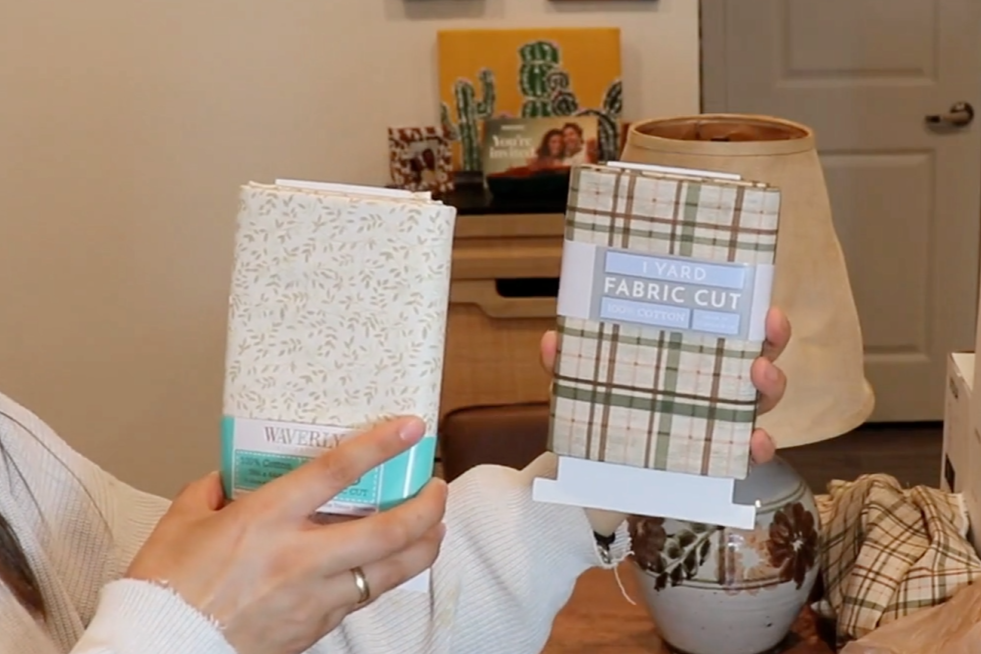
For this project, I wanted texture; something soft and sculptural. I found a thrifted lampshade and wrapped it in 2-inch fabric strips, folding and hot-gluing each one in layers to create a rippled, organic look. The results are cozy, inviting, and a little whimsical, like fabric waves catching the light. It’s an easy, meditative project that gives new life to secondhand finds while adding an artisanal touch to your lighting.


Supplies needed:
Lampshade (any size or shape)
Fabric
Hot glue gun and gorilla hot glue
Scissors
Measuring Tape (optional)
Step-by-Step Instructions:
1. Prepare Your Fabric Strips
Gather your fabric and cut them into strips about 2 to 3 inches wide.
Make sure each strip is long enough to wrap around the lampshade with a bit of overlap.
Pro-tip: Iron the strips beforehand for a neater look, or leave them slightly wrinkled for extra texture.
2. Fold & Prep Each Strip
Take each fabric strip & fold it in half lengthwise.
This fold gives your lampshade that rippled, layered texture.
You can press the fold lightly or keep it soft for a more relaxed, ruffled effect.
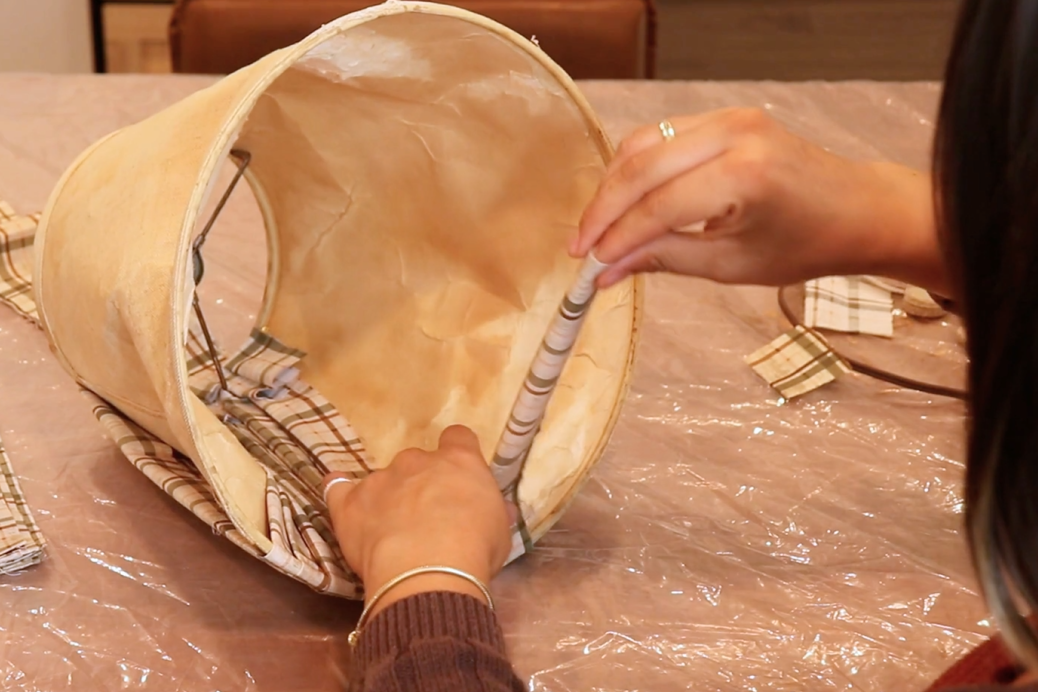
3. Begin Wrapping the Lampshade
Starting at the bottom edge of the lampshade, place the folded strip so the fold faces outward.
Apply a line of gorilla hot glue along the top edge where the fabric will attach.
Press the fabric strip firmly into the glue and wrap it all the way around the shade.
Overlap the ends slightly and secure with a small dot of glue.
4. Layer Your Fabric
Continue adding folded fabric strips around the shade, slightly overlapping each previous row
This creates that gorgeous rippled, layered look.
Work your way up until the entire lampshade is covered
5. Finishing Touches
Once covered, check for any loose spots and secure with extra glue if needed.
Trim any uneven fabric edges
Let the glue fully cool and set before placing the shade back on your lamp.
Transform an old lampshade into a gorgeous, textured centerpiece using fabric strips that are to your liking—whether its new fabric or thrifted fabric. This simple upcycling project adds color, texture, and personality to any room—and only takes a few supplies.
Final Result
You now have a stunning, upcycled lampshade with beautiful rippled texture! Each piece of fabric gives it a handmade, one-of-a-kind charm—no two will ever look the same.
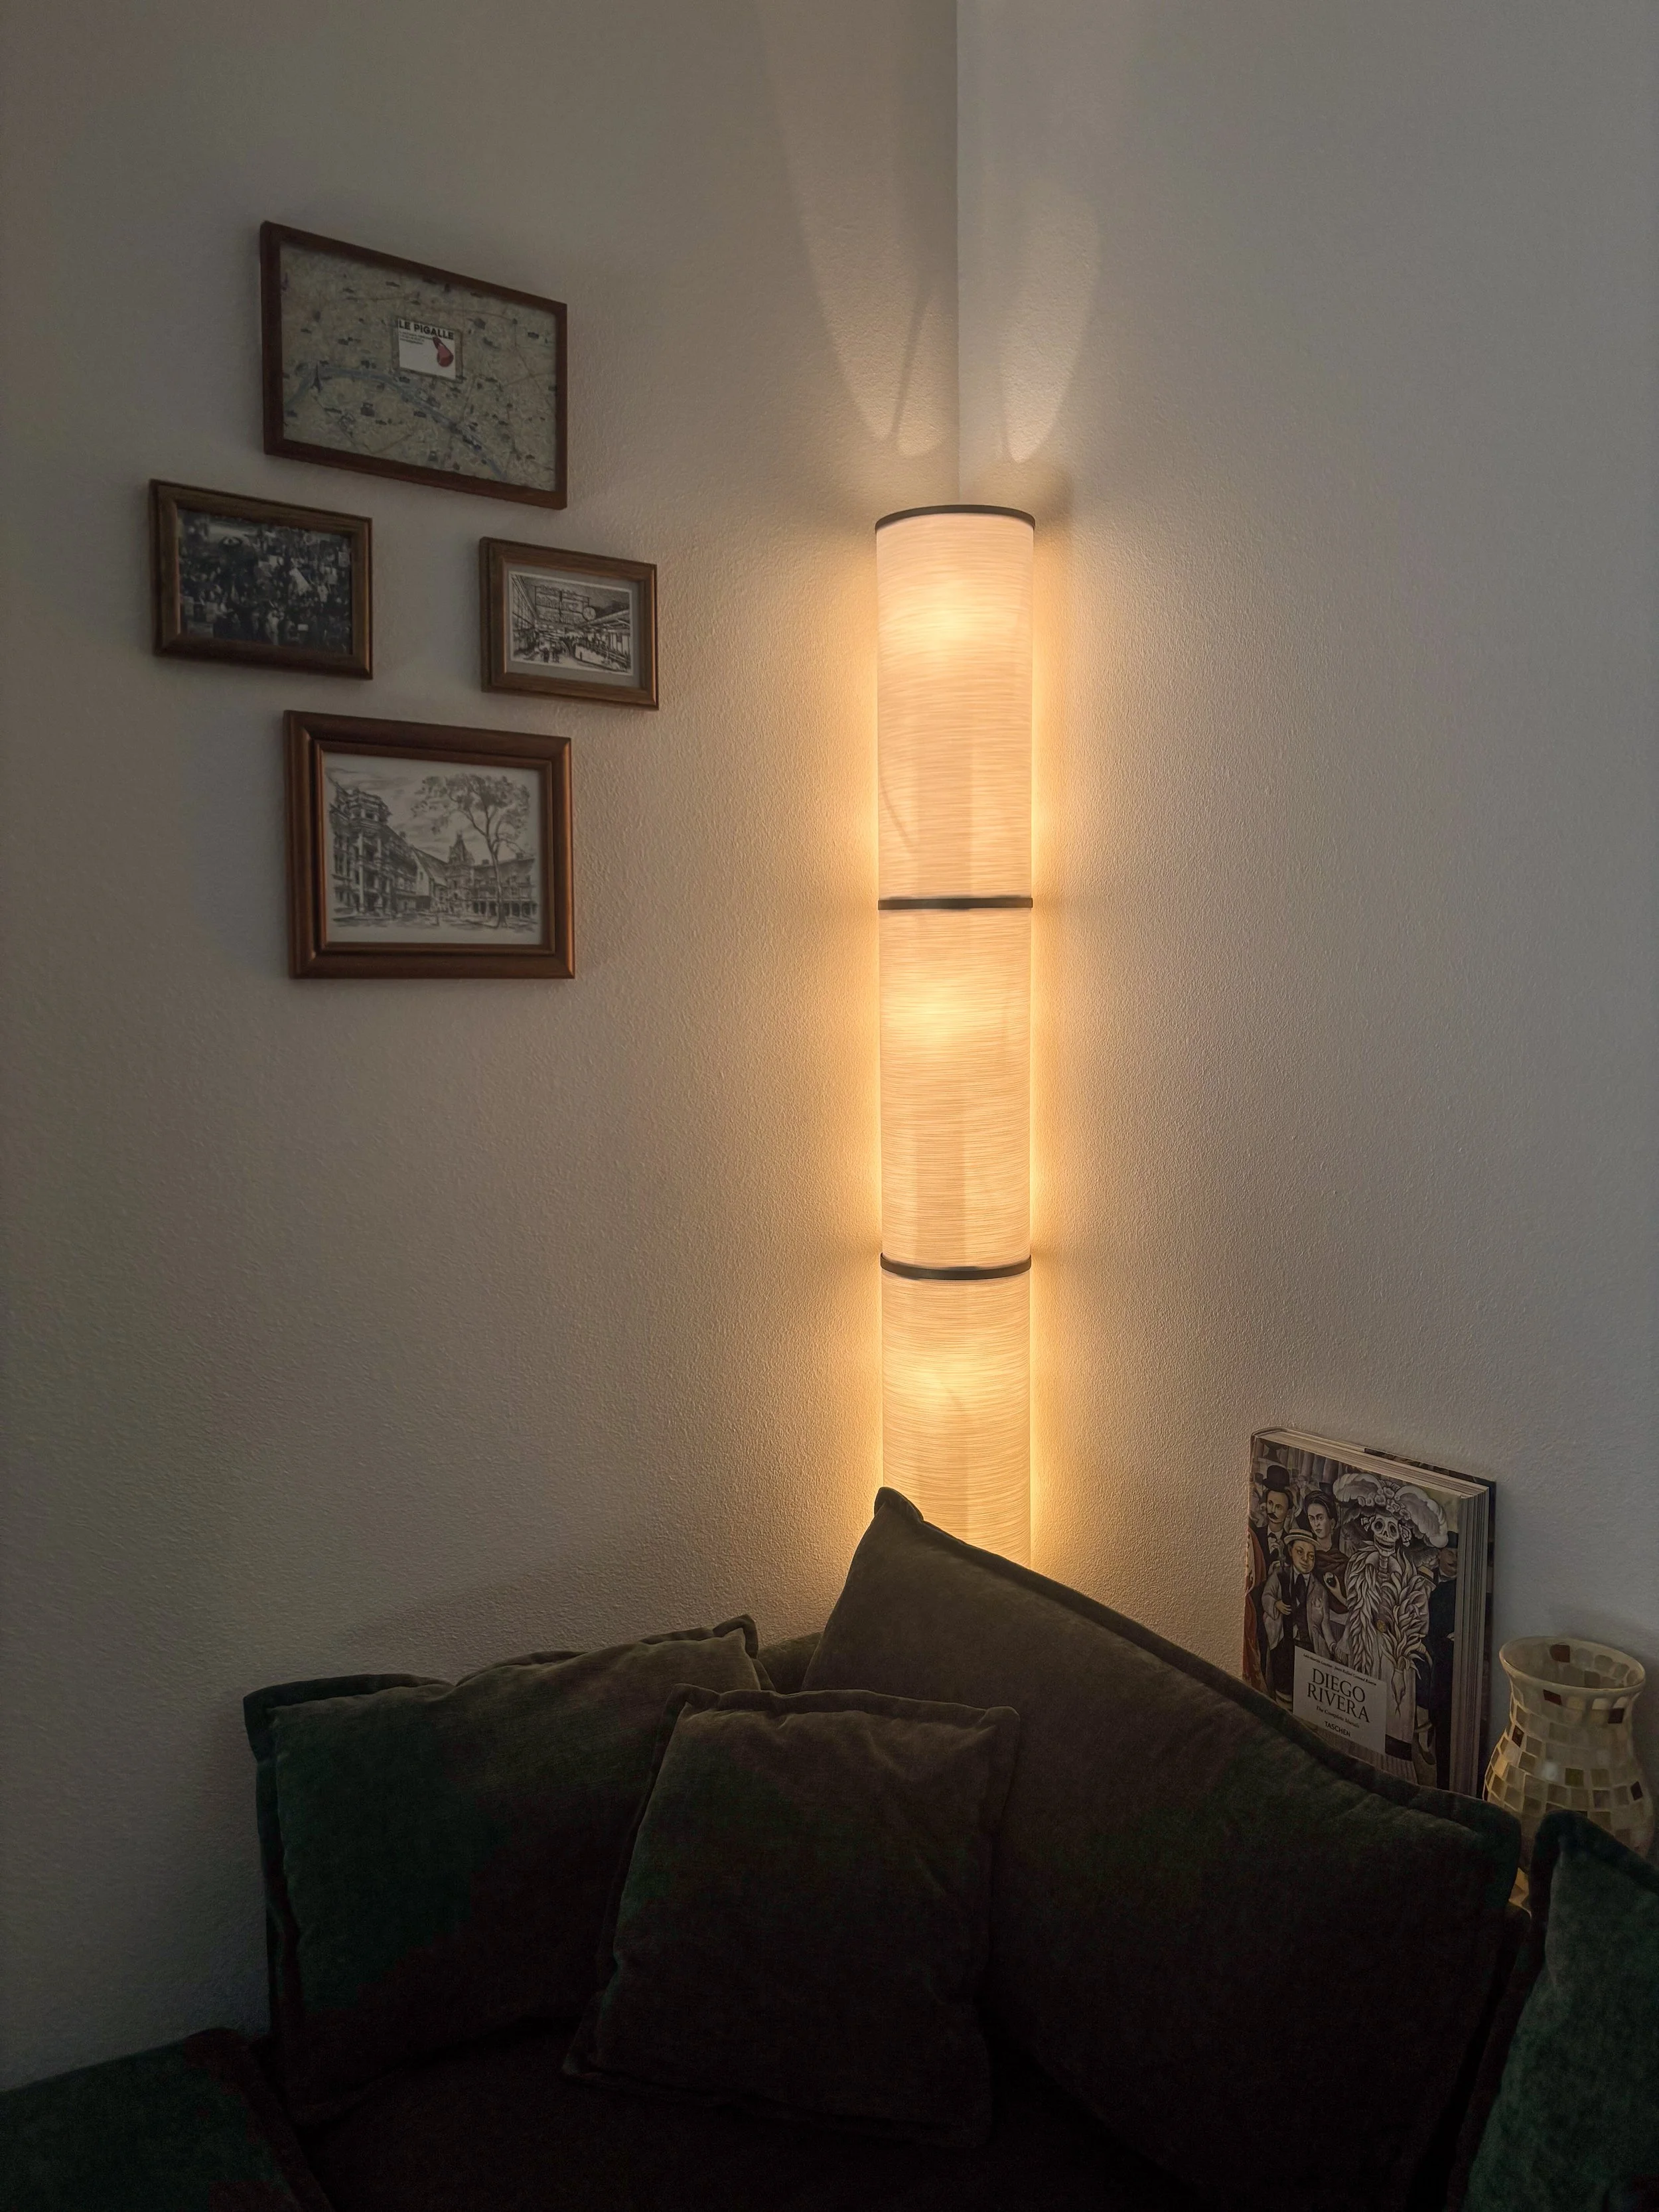
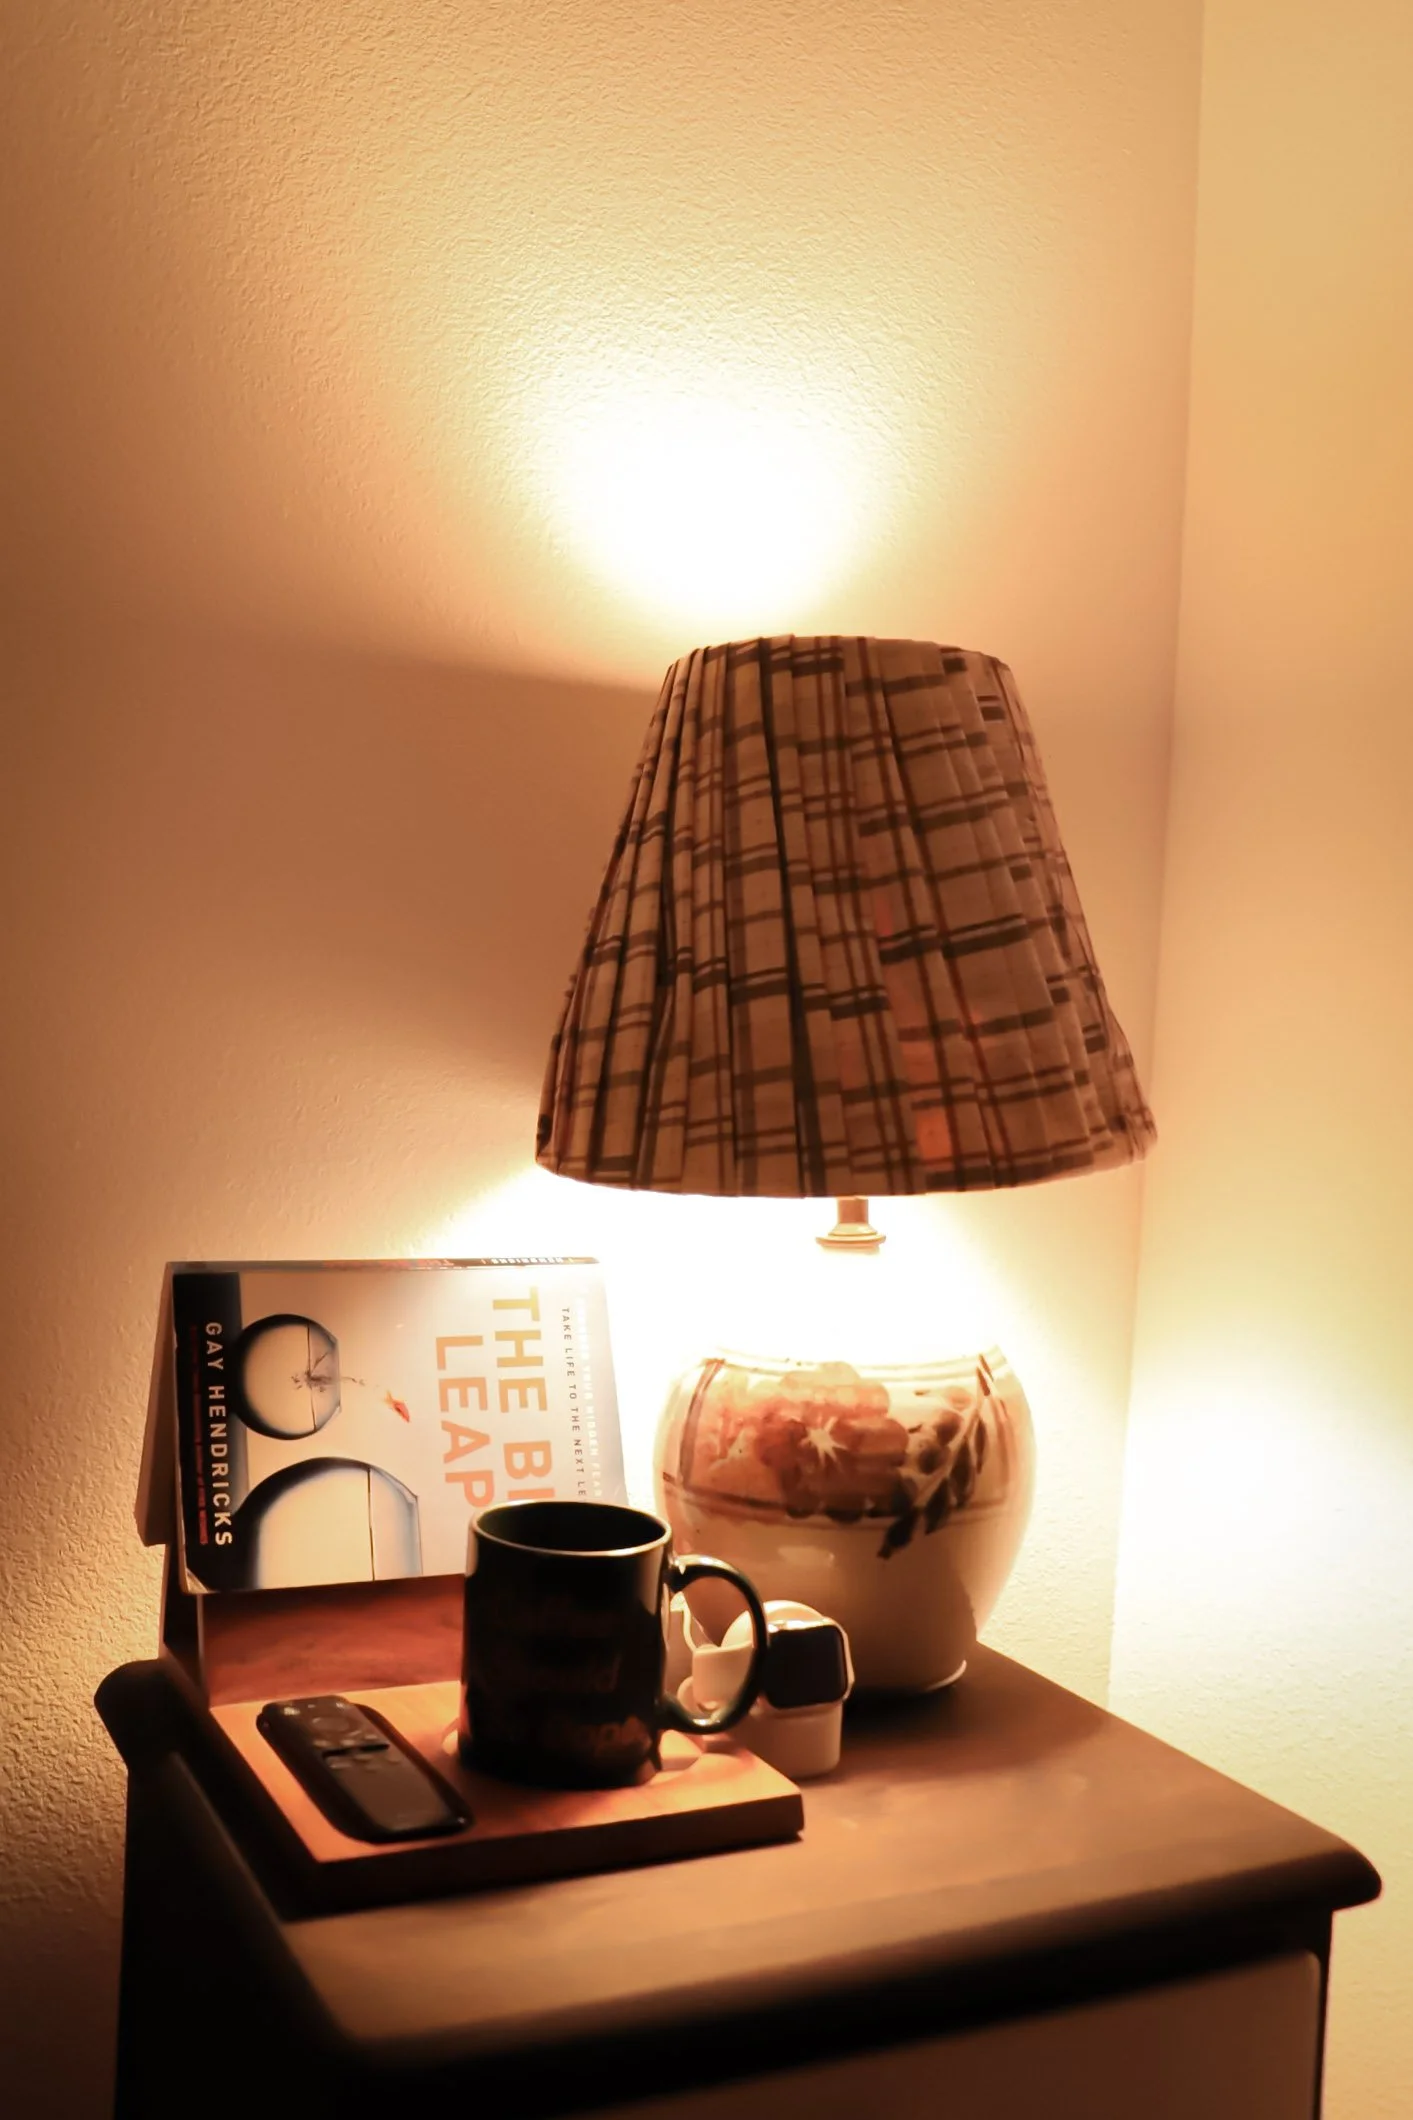
Elevated Floor Lamp
This project was all about giving a little bit of my personality to a sleek and modern lamp. I took a chrome-finished VIDJA floor lamp and completely changed its character with a little sanding, matte black spray paint, and a touch of antique gold Rub’n’Buff. The transformation turned a plain, mass-produced lamp piece into something that feels rich, moody, and full of warmth, like it has a story to tell. It’s proof that with a few accessible materials, you can create high-end looks that feel personal and timeless.


Supplies needed:
Floor Lamp (I used the VIDJA chrome floor lamp from IKEA)
220-grit sandpaper
Matte black spray paint (I used the Behr paint + primer combo)
Rub’n’Buff (antique gold)
Clean rags
Paper towels
Tarp of drop cloth (to protect your workplace)
Gloves (optional but recommended)
Mask (for spray painting and chrome sanding)
Light bulbs (for finishing and testing)
Step-by-Step Instructions:
1. Prepare Your Workspace
Lay down a tarp or drop cloth in a well-ventilated area or outdoors.
Make sure you have enough space to move around the lamp accessories while spraying.
Put on your mask and gloves if desired.
2. Gather Lamp Pieces
If required and/or possible, remove the lampshade and bulb before starting.
If not already done so, separate any detachable metal parts to make painting easier.
3. Sand the Surface
Lightly sand the chrome surface with 220-gril sandpaper.
The goal is to scuff up the shiny surface so the paint adheres better, don’t overdo it.
Wipe down the entire lamp with a rag or paper towel to remove dust.
4. Spray Paint
Shake your spray paint can thoroughly.
Apply thin, even coats of matte black spray paint, allowing each coat to dry according to the can’s instructions.
Rotate the lamp between coats to get full coverage and avoid drips.
Let the paint cure completely before moving on (check the can for drying time).
5. Add Antique Gold Accents
Using a small amount of Rub’n’Buff on your fingertip, soft cloth, or a soft paintbrush.
Lightly apply it to raised areas or edges where you want a subtle metallic highlight.
Blend and build the color gradually. You can always add more but can’t easily take it away.
Buff lightly to bring out a soft sheen.
6. Assemble or Reassemble & Finish
Once everything is fully dry, reassemble your lamp and screw in the light bulbs.
Step back and admire your work. The transformation from shiny chrome to rich, antiqued black and gold gives the piece a completely new personality.
Pro Tips:
Test your spray paint and Rub’n’Buff on a hidden section first to see how the finishes interact.
Don’t rush drying times; patience ensures a professional look.
Use warm-toned light bulbs to enhance the moody, antique vibe.
Why I love these Projects
Each of these DIYs started with the same goal: to make something warm, inviting, and uniquely mine using some items I already had on hand. They’re all proof that beautiful design doesn’t have to be expensive or complicated. It just takes curiosity, a bit experimentation, and a willingness to play. Whether you’re upcycling, repainting, every small creative choice adds up to a space that truly feels like home.

Full YouTube Video Link: https://youtu.be/JnY-naTmn88
If you’re like me and love seeing the process unfold, I’ve put together a full video on YouTube that takes you through each of these DIYs in real time.
You’ll get all the tips, mishaps, and little ‘aha’ moments that photos can’t quite capture.
Come hang out! I’d love to show you how it all lights up.